The Create Template dialog box makes it easy to create a template that simple to use, and provides a real-time preview of what the user will see as you are creating it. This allows you to make adjustments to help keep the template user-friendly.
To create the most usable template, take advantage of the features the Create Template dialog box offers.
- Specify a good title and description
- Each target series has target filters and a grouping that can be unlocked as inputs; choose only the most essential, and consider leaving a default value to help users
- You can change the name of the input and add help text
- Reorder the inputs by dragging and dropping if they aren't in a logical order
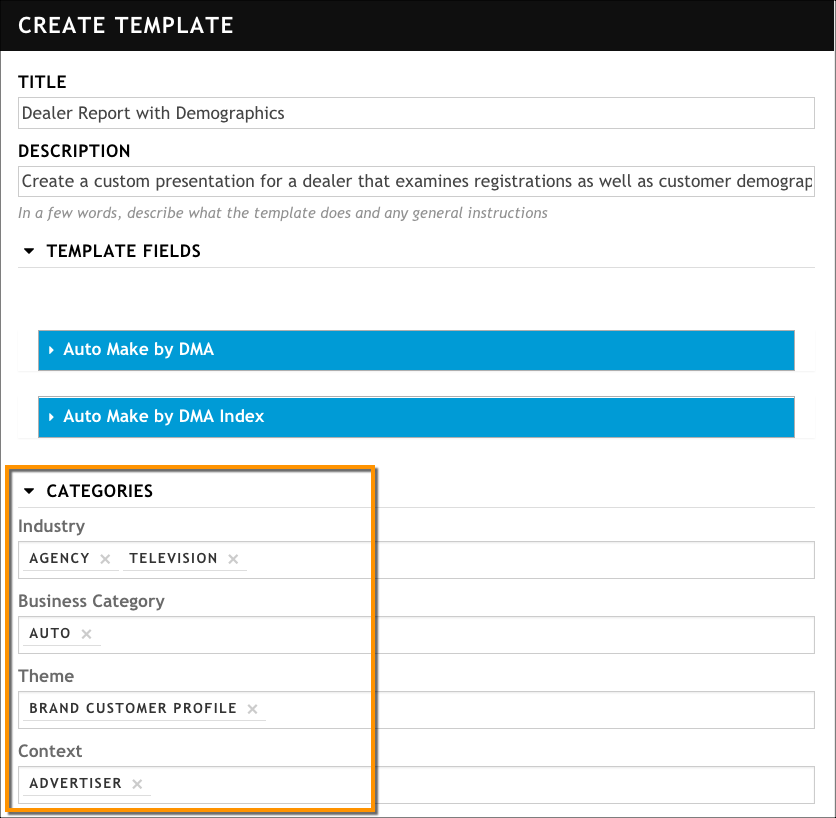
- Include metadata to correctly identify your template's business category, theme, and context
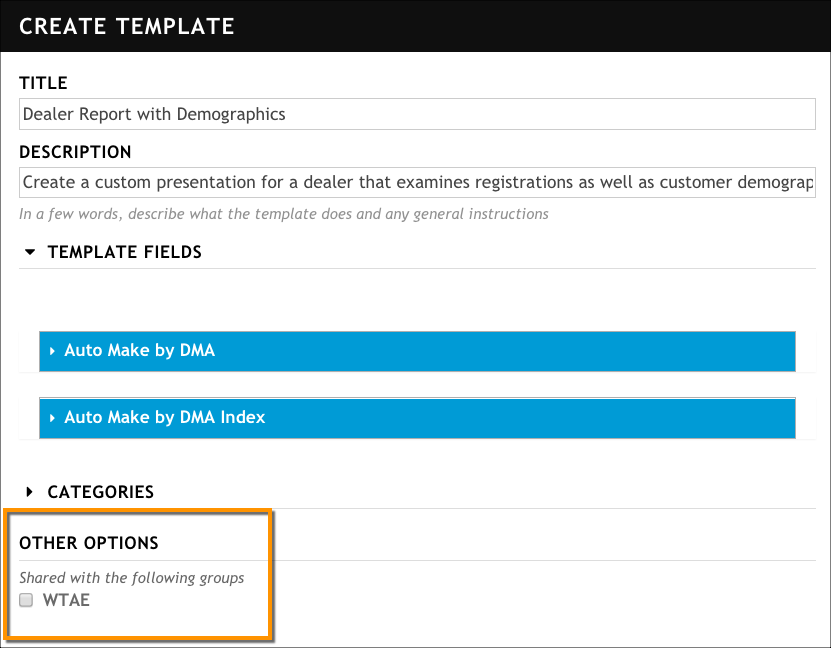
- Share the template with the correct group or groups
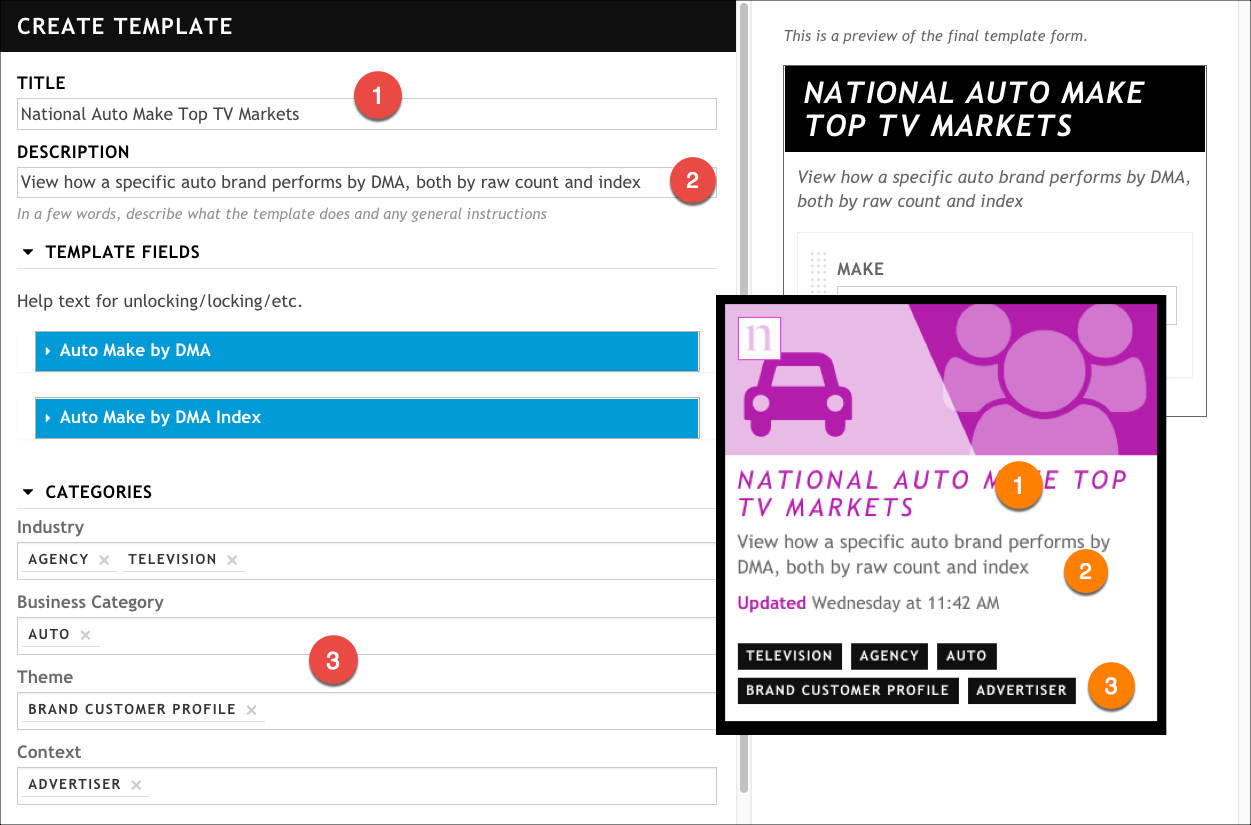
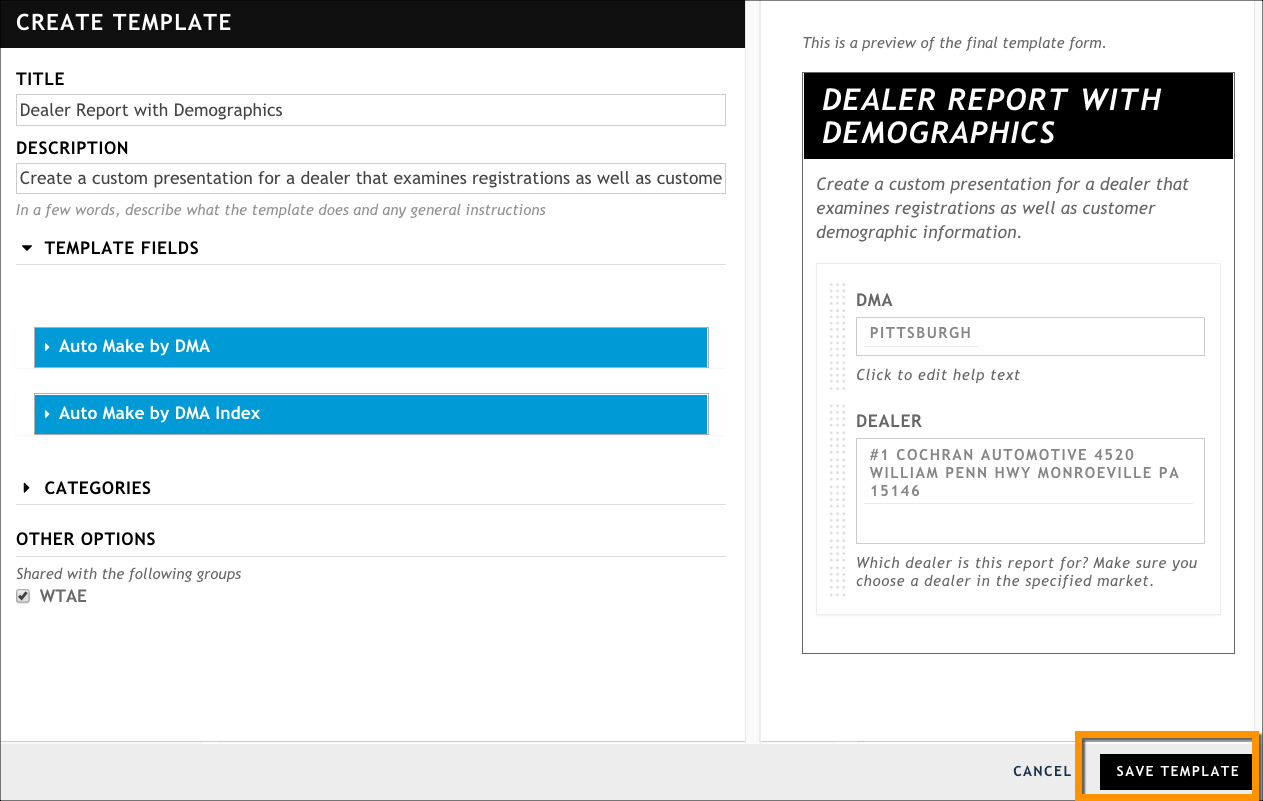
To clearly illustrate how the data you enter in the Create Template dialog box translates into a finished template card on the Template Explorer, compare the inputs 1, 2, and 3 with the equivalent outputs:
Templates are created at the section level, rather than at the presentation level. This means that if you have a presentation with multiple sections, each section will have its own template.
Before You Begin
Make sure you've completed the steps in Prepare for a Template.
From the top right of the presentation, click Create Template.
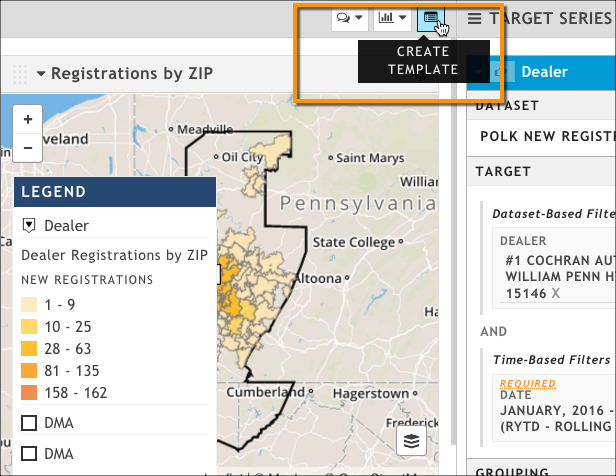
The Create Template dialog box opens. This is where you will do all of the template creation work.
Add a meaningful title in the Title field. The title should be brief but clearly describe what kind of presentation will be generated from this template.
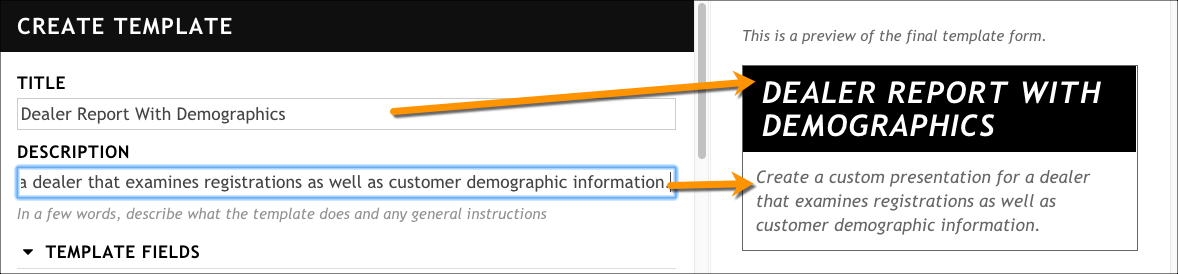
Use the Description field to tell users what the template does or provide any important information the users need.
For each target series in your presentation, decide which -- if any -- filters to unlock, and whether to unlock them with or without a default value in place. When you unlock a filter, this gives the template user the power to change its value when generating a presentation from the template. Be judicious about what you select.
Click the lock icon next to the filter you want to unlock.
From the drop-down menu, select either Unlocked, Default (the user sees the default value you used when creating the template, but can change it), or Unlocked, No Default (the user sees an empty field).
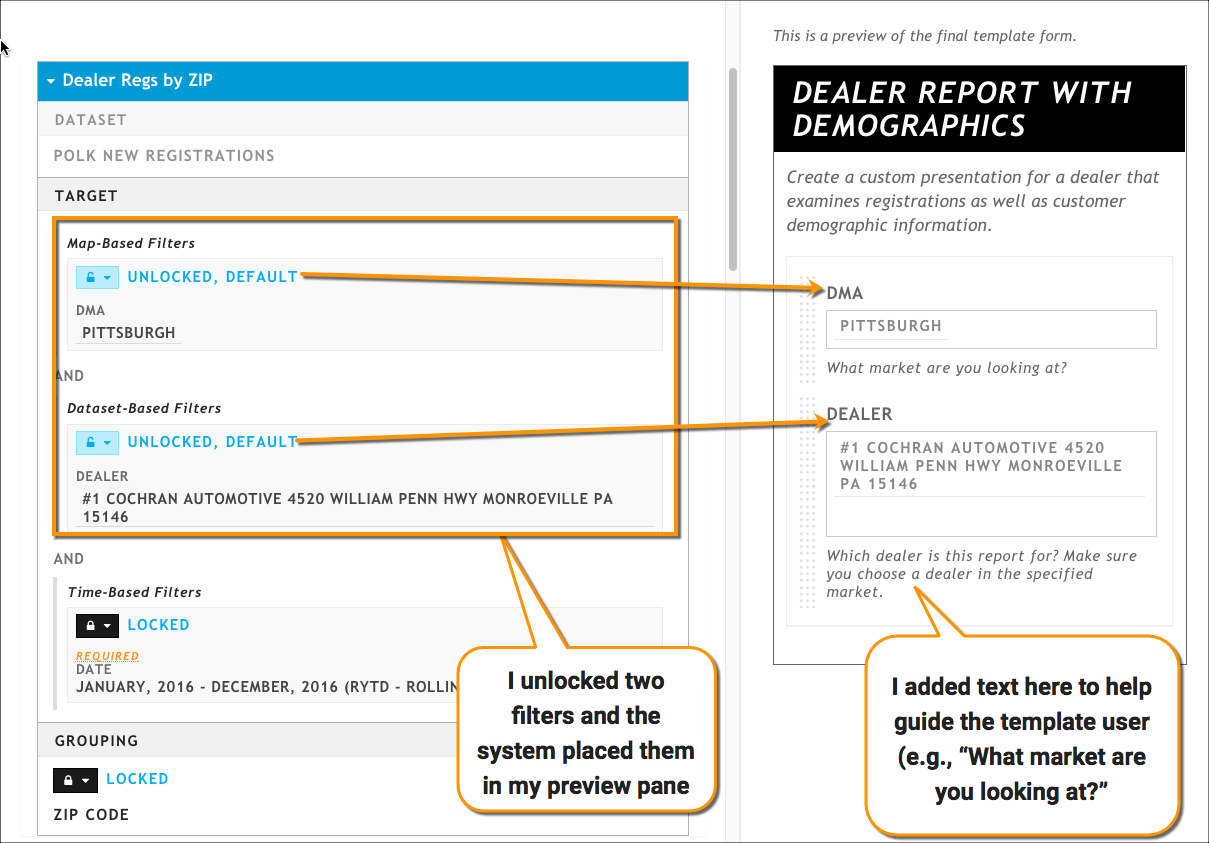
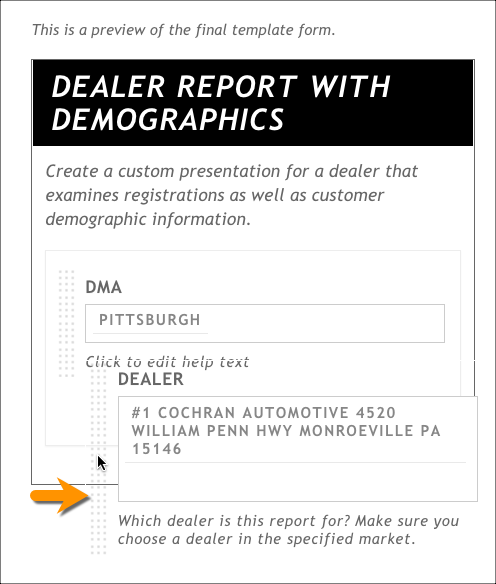
Optionally, add help text for each unlocked input in the preview pane.
Optionally, change the name of the input to something more intuitive for the user.
When you are finished unlocked inputs, evaluate the order. If necessary, use the handles next to each input to drag and drop them into an order that is most understandable for the template user.
Specify the categories for your template. This information drives how your template will be categorized during searches, and how it will be visually styled.
Share your template with the appropriate group or groups.
Click Save Template.
Your template is published to the Sales Explorer. You can find it by clicking ALL, or by searching for it by name.
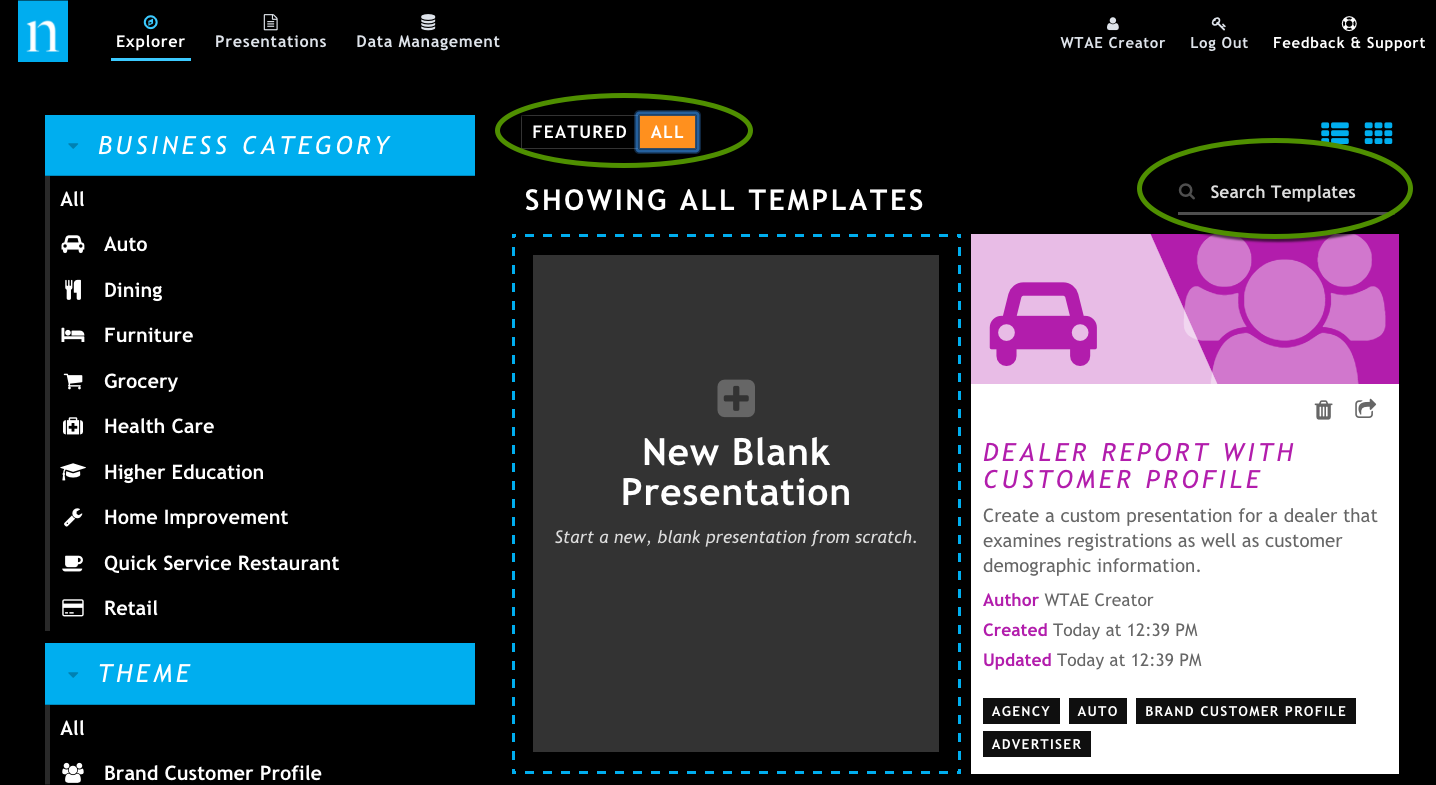
Remember: The Featured templates are those that are provided by Nielsen, and those are shown by default on the Sales Explorer. Templates that you publish will always be under the ALL tab.
What to Do Next
Go to the Sales Explorer and use your template to create a presentation, just to make sure the user experience is a good one. If it isn't, you can always update the presentation (if necessary) and recreate the template to make the changes. Don't forget: You'll have to delete the original template to prevent user confusion.