You can append and replace data of an existing user uploaded dataset in Rhiza.
Before You Begin
- Make sure that the columns of the CSV that you would like to add to your existing dataset are identical. They have to have the same title and the same data type.
- You can add a CSV file to an existing dataset that has more or less columns than your original dataset, Rhiza will just add any extra columns and show null values in the rows that don't have the extra column.
Steps
- From the Data Management tab, go find your dataset and click on it.
- You will get to the Dataset Page. From there, you can append data to your existing dataset.
- Drag and drop files from your computer into the grey box on the right hand side (maximum 5 at once) or click the "Browse Your Computer" link. Note, if you intend to upload multiple CSVs and you intend to append directly to the dataset, your column titles and data types must be identical across files.
- Once your file is processed, you will see an overview of the columns and the data type fields. If you added a new column, it will be highlighted in orange.
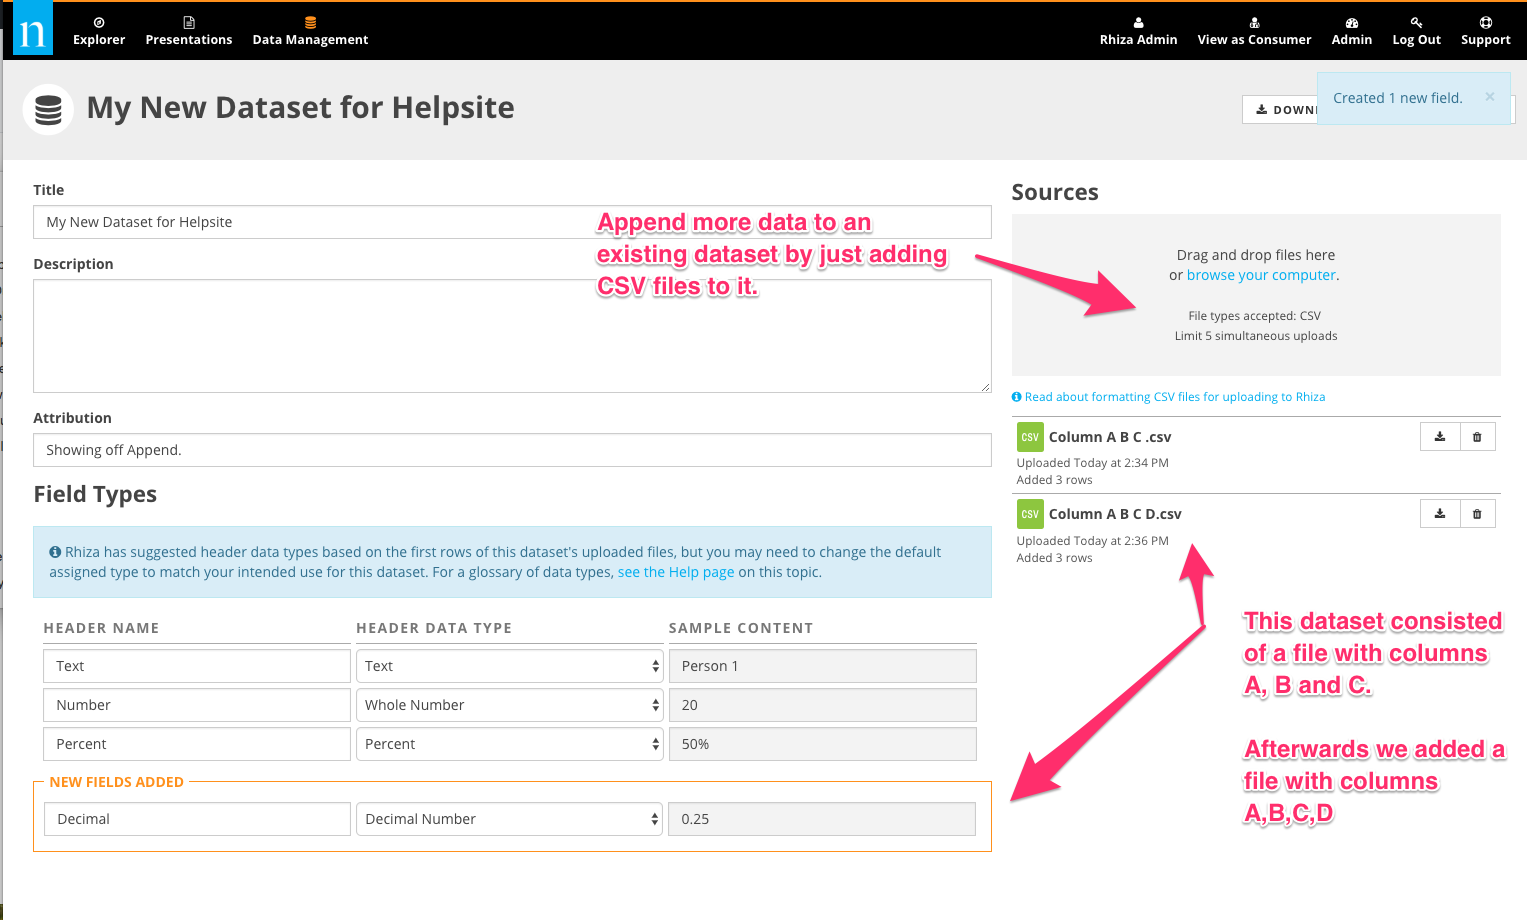
- In the screenshot above you can see that the original dataset contained one file with columns A, B, and C. Another CSV was added with columns A, B, C, and D. All the data is now in the dataset.
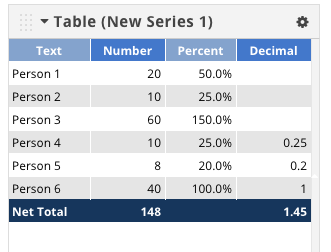
- The table below shows what happens when you introduce new columns with a CSV append. You'll see null values in the extra columns where there was originally no data.
Hints
- You can re-define your data types after you've already saved a dataset. If you redefine a data type, your change will apply to the entire column.
- Make sure your files contain all the information you need. For example, if you have a CSV with daily sales for January, make sure that you have a column that just says January in every cell, or a date on every record so that later–when you add February—you can filter by January, February, or date.
- You can change your attribution anytime. Use it to reflect any updates!